


PayPal keeps a full history of every payment you’ve sent or received, but it lives inside PayPal’s platform, not in a spreadsheet where you can actually analyze it. Exporting it takes a few steps, and the result is a CSV file that you can open in Google Sheets or Excel.
This guide walks you through the full export process and how to get that data into a usable spreadsheet format. If you’re tracking PayPal transactions regularly — especially for business expenses, freelance income, or personal finance — the end of this guide also covers how to automate the process so your PayPal transactions flow into your spreadsheet daily, with no manual downloads.
How to export PayPal transactions as a CSV
Step 1: Log in to your PayPal account
Go to paypal.com and sign in.
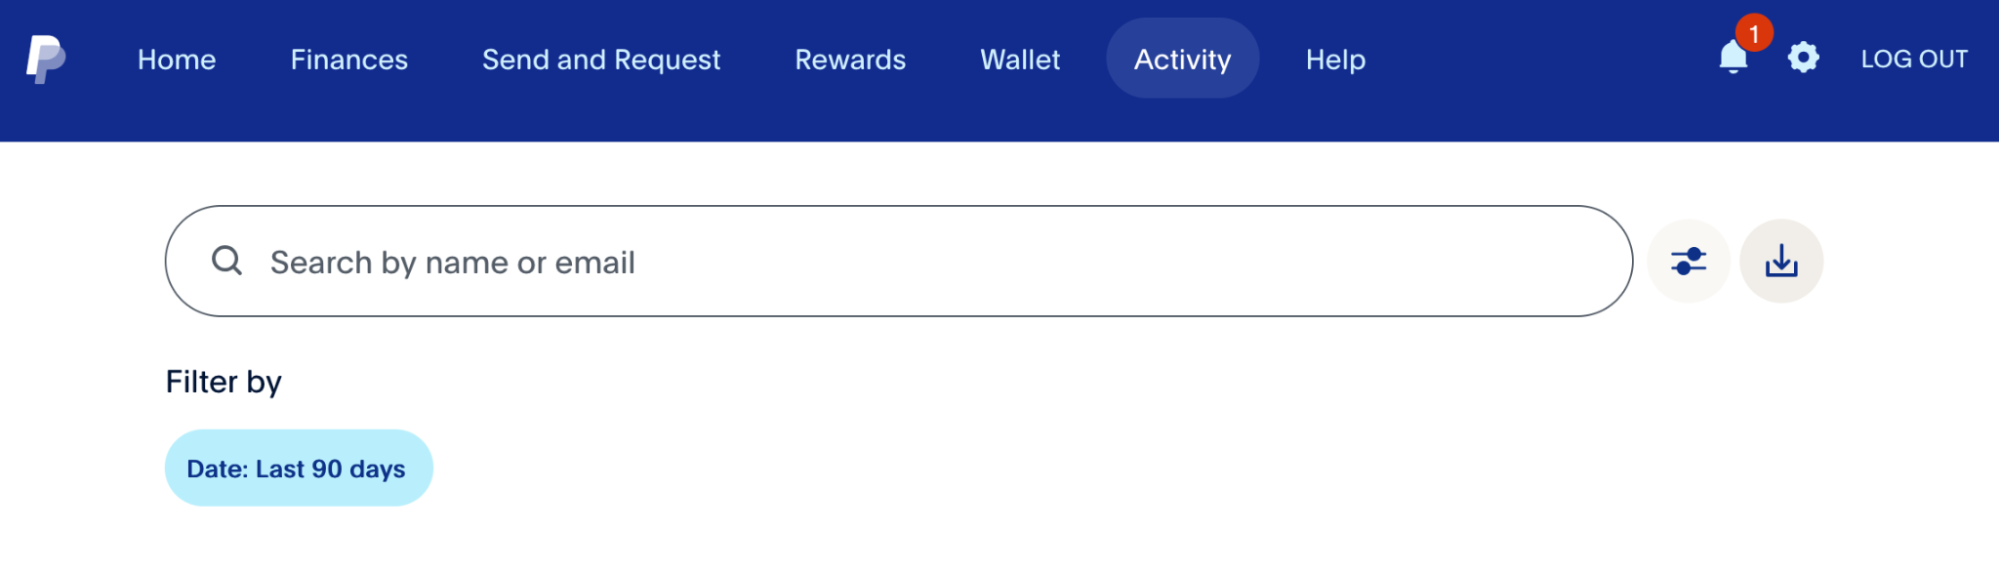
Step 2: Go to Activity
Click Activity in the top navigation to see your transaction history.

Step 3: Access the download option
Click the download icon.
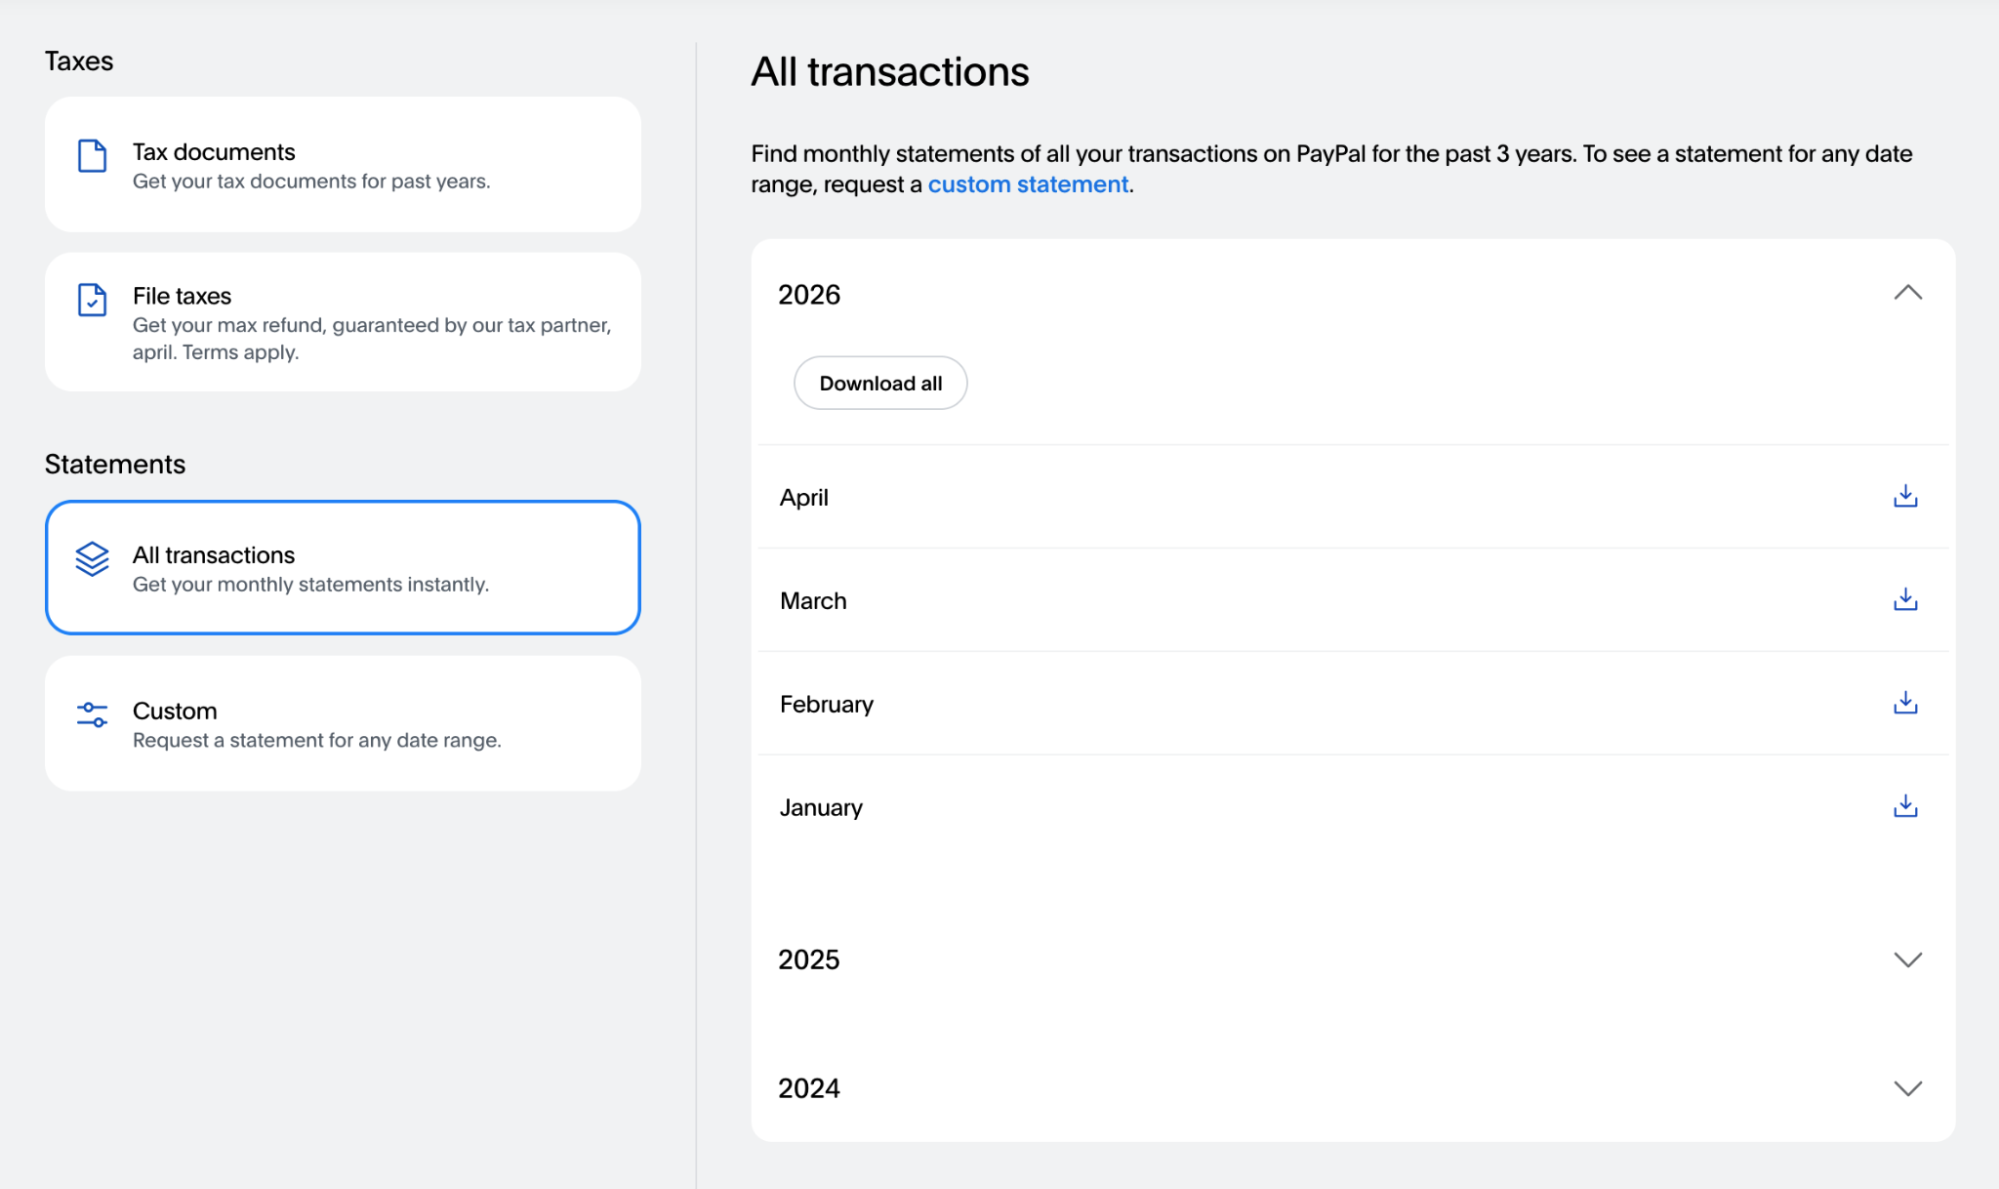
Step 4: Get Custom statements
On the All Transactions page, in the Statements section, click Custom
Step 5: Select your date range and file format
- Choose a custom date range.
- For File Type, select CSV for best compatibility with Google Sheets and Excel.
- Note: PayPal offers Balance Affecting Payments, Completed Payments, and All Transactions. Select whichever covers the data you need. Usually that is All Transactions.
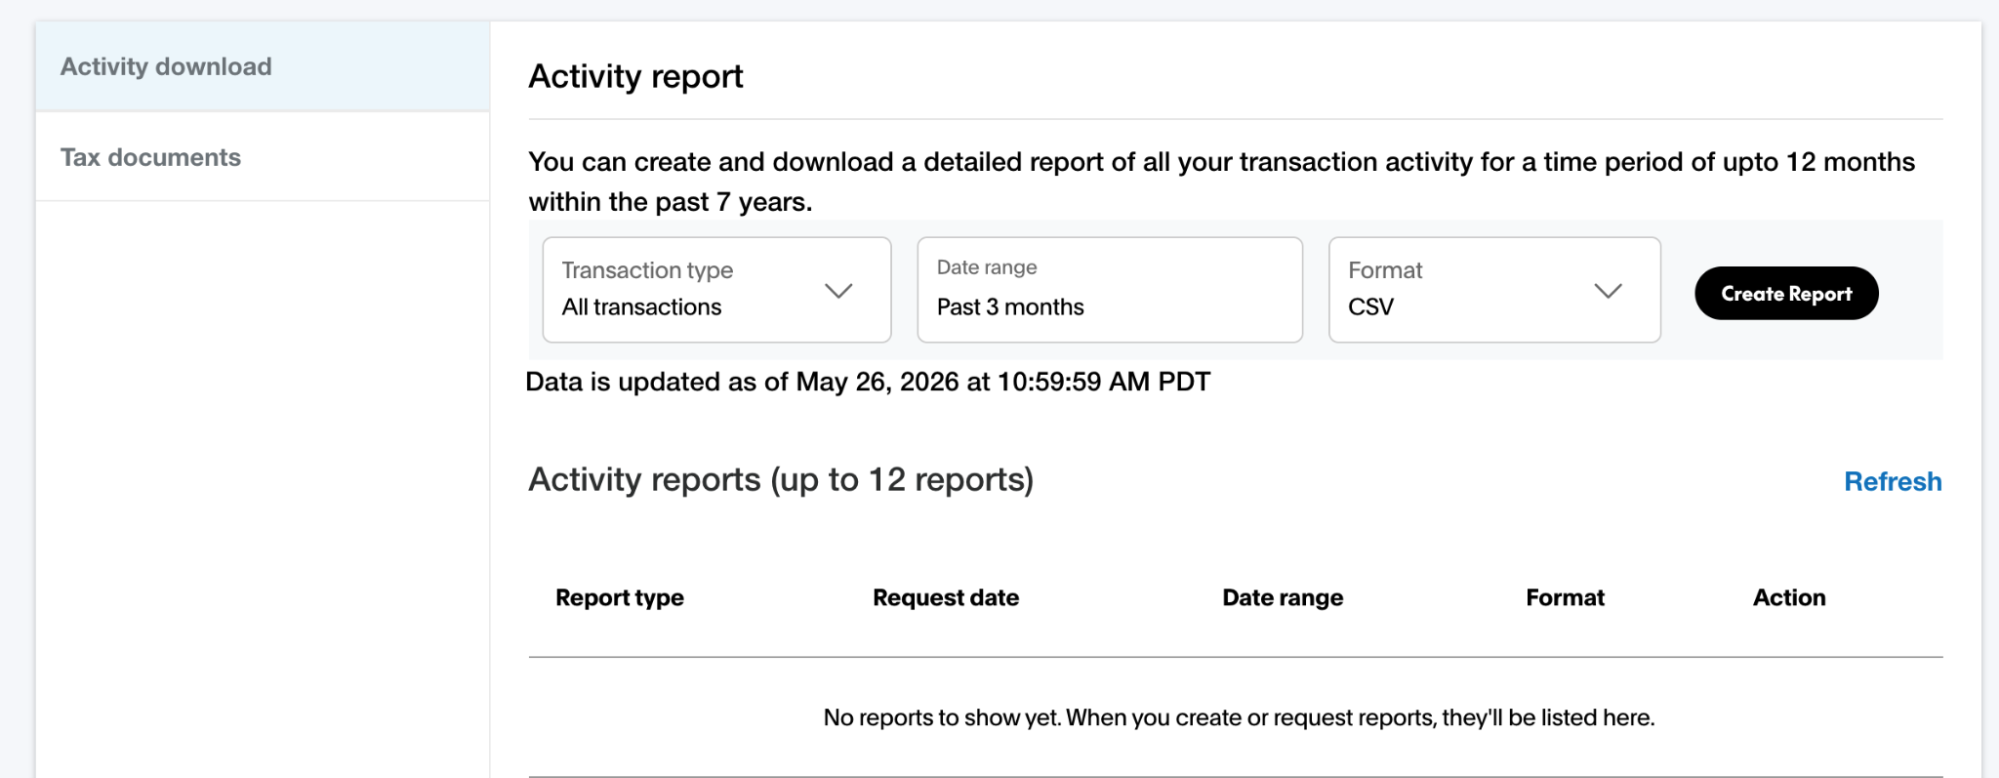
Step 6: Download the file
Click Download and save the CSV file to your computer.
How to open your PayPal CSV in Google Sheets
- Go to sheets.new to open a new Google Sheet, or go to the home page for your Google Drive or Sheets account.
- Click File → Open → Upload.
- Drag and drop your downloaded CSV file or click Browse to select it.
- Google Sheets will import the file and display your PayPal transactions.
How to open your PayPal CSV in Microsoft Excel
- Open Excel and click File → Open.
- Browse to your downloaded CSV file and open it.
- Excel’s Text Import Wizard may appear. If so, select Delimited, click Next, check Comma, and click Finish.
- Your PayPal transactions will appear in Excel.
Alternatively, go to excel.cloud.microsoft, click Upload a File, and select your downloaded CSV.
PayPal’s CSV export includes columns for Date, Time, Time Zone, Name, Type, Status, Currency, Amount, and more. You may want to delete columns you don’t need and reorder the remaining ones to match your existing transaction sheet structure.
Limitations of manual PayPal exports
Manual CSV exports work, but there are drawbacks if you’re tracking PayPal regularly:
- Date range limits: PayPal limits the amount of data you can export at once. For long histories, you’ll need multiple separate exports.
- No real-time data: Your spreadsheet is only up-to-date as of the last export.
- Format cleanup required: PayPal’s column structure doesn’t match a standard transaction sheet, so you’ll spend time reformatting each time.
- Multiple account types: If you have both personal and business PayPal accounts, you’ll need separate exports for each.
- Manual process every time: There’s no way to schedule automatic exports. You have to repeat these steps every time you want to update the data.
Automate PayPal tracking with Tiller
If you’re using PayPal regularly — especially for business payments, freelance income, or personal purchases — the manual export process can take a lot of time each month.
Tiller connects your PayPal account directly to Google Sheets or Excel and automatically imports your transactions each day into the Foundation Template or your own spreadsheet. Your PayPal activity shows up in your spreadsheet alongside your bank accounts, credit cards, and investment accounts.
Once connected, AutoCat automatically categorizes your PayPal transactions based on the rules you define. Incoming freelance payments go to Income, software subscriptions go to Business Expenses, and so on.
Frequently asked questions
Q: Can I export my full PayPal transaction history?
PayPal allows exports dating back up to 7 years in most cases, but the available date range may vary by account type and region. For large histories, you may need to run multiple exports covering different date ranges and combine them in your spreadsheet.
Q: What file format should I choose when exporting PayPal transactions?
Choose CSV for the best compatibility with Google Sheets and Excel. PayPal also offers a Balance Affecting Payments option; use this if you want only transactions that change your PayPal balance rather than all activity.
Q: Why does my PayPal CSV look messy when I open it in Google Sheets?
PayPal’s CSV export includes many columns that most users don’t need, including time zone, item title, transaction ID, and more. After importing, delete the columns you don’t need and reorder the remaining ones to match your existing transaction sheet structure. If you use Tiller, this cleanup happens automatically.
Q: Can Tiller automatically import PayPal transactions into my spreadsheet?
PayPal’s CSV export includes many columns that most users don’t need, including time zone, item title, transaction ID, and more. After importing, delete the columns you don’t need and reorder the remaining ones to match your existing transaction sheet structure. If you use Tiller, this cleanup happens automatically.
Q: Does PayPal let me export transactions from both personal and business accounts?
Yes, but separately. You’ll need to log into each account individually and run a separate export for each. If you connect both accounts to Tiller, all transactions appear in one spreadsheet automatically.